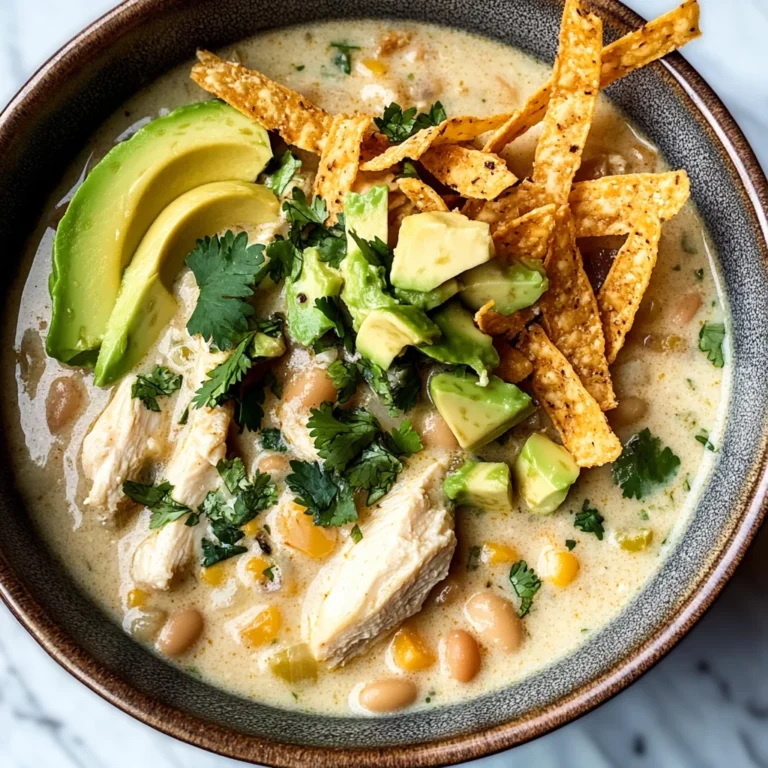
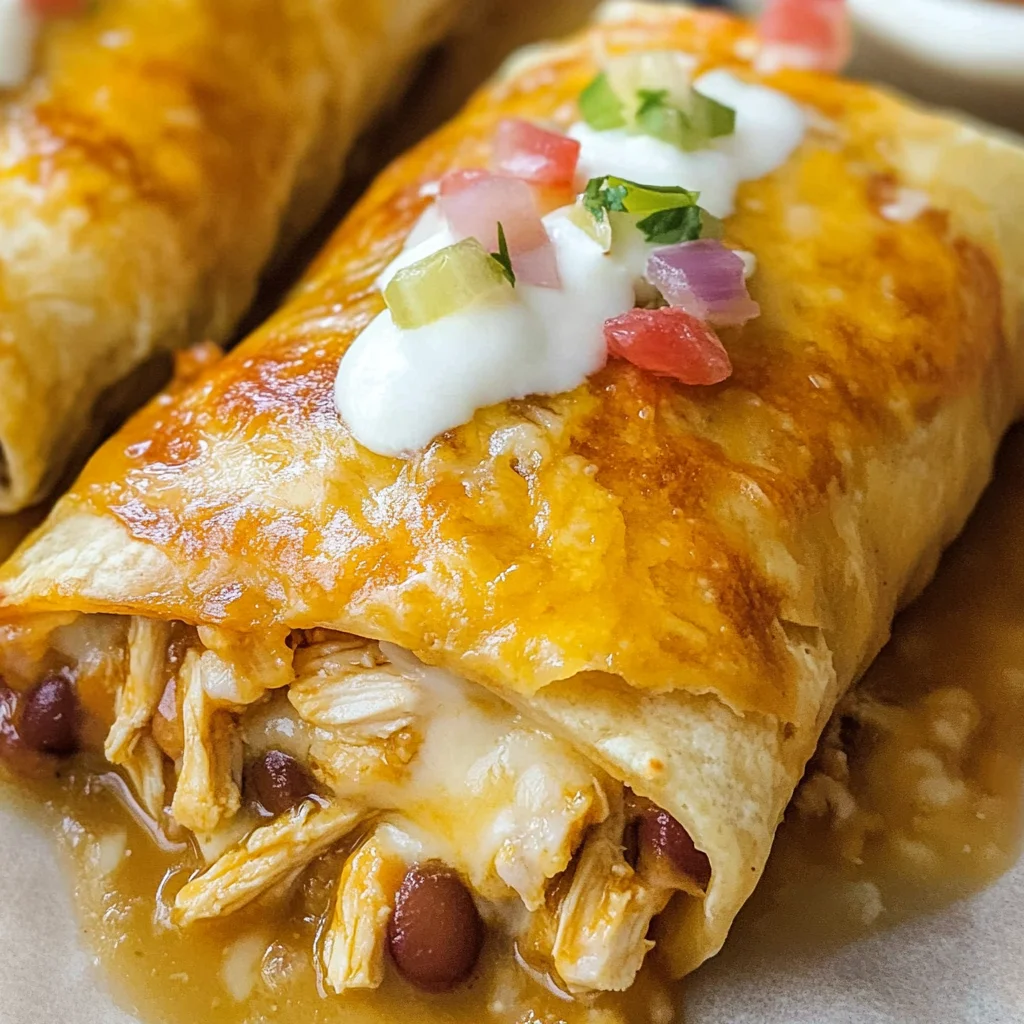
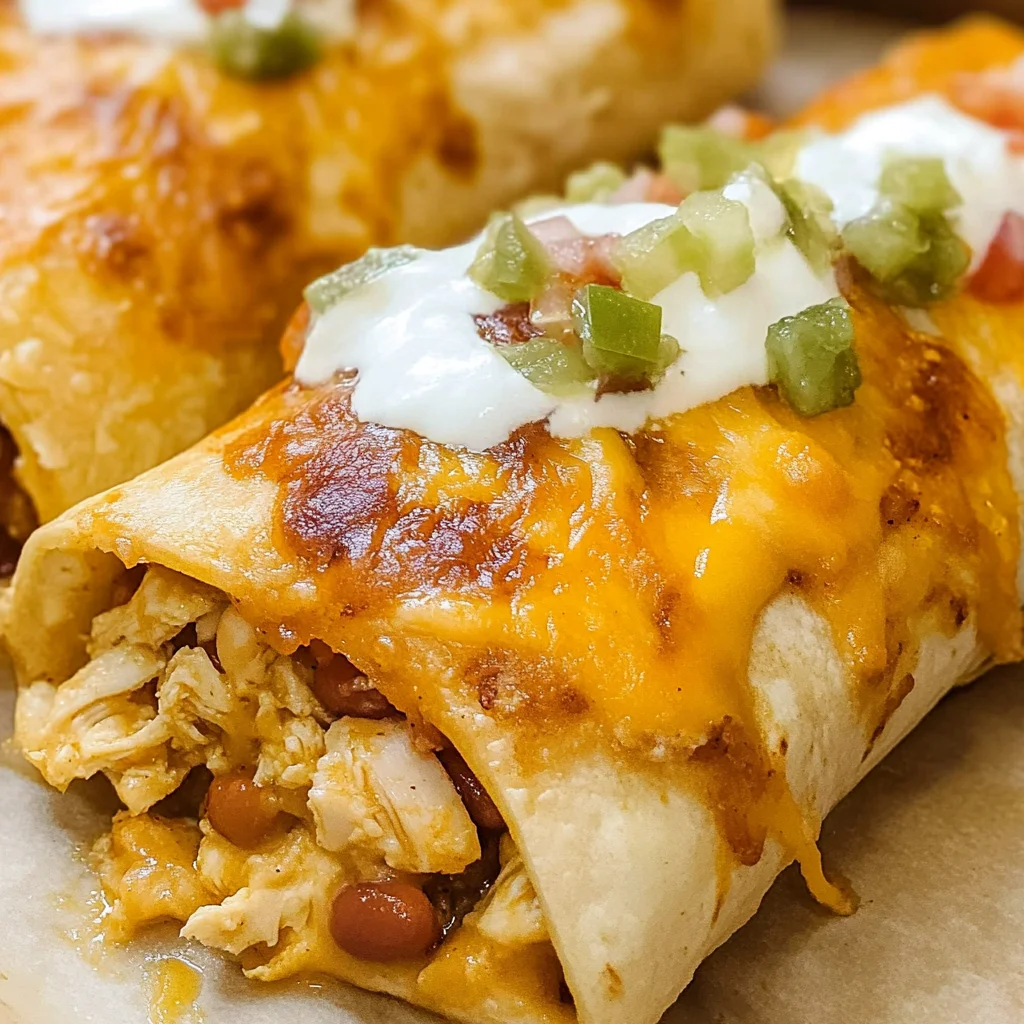
Baked Chicken Chimichanga
Baked Chicken Chimichanga is a delightful twist on a favorite Mexican dish. This easy recipe combines tender shredded chicken with creamy refried beans, zesty salsa, and melty cheese, all wrapped in a perfectly baked tortilla. Perfect for weeknight dinners, gatherings, or any occasion, this dish ensures everyone gets a taste of something delicious and satisfying.
Why You’ll Love This Recipe
- Quick Preparation: With only 15 minutes of prep time, you can have a hearty meal ready in no time.
- Flavor Packed: The combination of spices and ingredients creates an explosion of flavor in every bite.
- Family-Friendly: Kids and adults alike will enjoy these crispy chimichangas, making it a hit for family dinners.
- Versatile Ingredients: Customize the filling with your favorite vegetables or spices for a unique twist every time.
- Perfect for Meal Prep: These chimichangas freeze well, making them an excellent choice for easy future meals.
Tools and Preparation
To make Baked Chicken Chimichangas, you’ll need a few essential tools to ensure everything goes smoothly.
Essential Tools and Equipment
- Large mixing bowl
- Baking sheet
- Brush for butter
- Sharp knife
- Cutting board
Importance of Each Tool
- Large mixing bowl: Ideal for combining all the filling ingredients without spilling.
- Baking sheet: Provides ample space to bake multiple chimichangas at once for even cooking.
- Brush for butter: Helps achieve that golden-brown crispy finish on the chimichangas.
Ingredients
To create your delicious Baked Chicken Chimichanga, gather the following ingredients:
For the Filling
- 2 cups cooked shredded chicken
- 1 1/3 cup refried beans
- 1 1/3 cup salsa (your favorite kind)
- 2 teaspoon coriander (optional)
- 1 tablespoon chili powder
- 1 cup shredded cheese (cheddar or Mexican blend)
- 6 green onions (chopped or regular onion)
- 2-3 jalapeños (diced with seeds; adjust to your spice preference)
For Assembly
- 3 tablespoons butter (melted)
- 6-8 large taco-sized flour tortillas (8-inches)
How to Make Baked Chicken Chimichanga
Step 1: Preheat the Oven
Preheat your oven to 400°F. This ensures that your chimichangas will bake evenly and become perfectly crispy.
Step 2: Prepare the Filling
In a large bowl:
1. Mix together the cooked shredded chicken, refried beans, salsa, coriander, chili powder, shredded cheese, green onions, and jalapeños.
2. Combine well until all ingredients are evenly distributed.
Step 3: Assemble the Chimichangas
For each tortilla:
1. Spread some filling in the center of the tortilla.
2. Fold the bottom edge of the tortilla up over the filling.
3. Fold in the sides tightly and then roll up completely to form a burrito shape. Be careful not to overfill.
Step 4: Bake the Chimichangas
- Place each chimichanga seam-side down on a large baking sheet.
- Brush the tops generously with melted butter.
- Bake in preheated oven for 15 minutes, then carefully flip them over and bake for an additional 10 minutes or until they are golden brown and crispy.
Step 5: Serve
Allow chimichangas to cool slightly for about 5–10 minutes before serving. Enjoy them with toppings such as sour cream, guacamole, salsa, or pico de gallo!
Enjoy your homemade Baked Chicken Chimichanga!
How to Serve Baked Chicken Chimichanga
Baked Chicken Chimichangas are versatile and can be served in various ways to enhance your dining experience. Here are some delicious serving suggestions to make your meal even more enjoyable.
Toppings
- Sour Cream: A dollop of sour cream adds creaminess and balances the flavors.
- Guacamole: Fresh guacamole complements the spices and adds a rich, buttery texture.
- Pico de Gallo: This fresh salsa made with tomatoes, onions, and cilantro adds brightness and crunch.
Sides
- Mexican Rice: Fluffy rice seasoned with lime and cilantro pairs perfectly with the chimichanga.
- Refried Beans: Creamy refried beans add extra protein and make the meal heartier.
- Corn Salad: A refreshing corn salad provides sweetness and a nice crunch.
Drinks
- Lemonade: A cool glass of lemonade balances the spiciness of the chimichanga.
- Iced Tea: Unsweetened iced tea is a great refreshing option that won’t overpower the meal.
How to Perfect Baked Chicken Chimichanga
To ensure your Baked Chicken Chimichanga turns out amazing every time, consider these tips for perfection.
- Use Warm Tortillas: Warming tortillas makes them more pliable, preventing cracking when rolled.
- Don’t Overfill: Keep the filling modest; overfilling can lead to messy chimichangas that won’t hold together.
- Brush with Butter Generously: A good layer of melted butter creates a golden, crispy exterior that enhances flavor.
- Adjust Spice Levels: Modify jalapeño amounts based on your spice tolerance for a comfortable heat level.
Best Side Dishes for Baked Chicken Chimichanga
Serving side dishes with your Baked Chicken Chimichanga can create a complete meal. Here are some excellent options to consider:
- Spanish Rice: Flavored with tomatoes and spices, this rice is a classic accompaniment that complements Mexican dishes well.
- Black Beans: Rich in protein, black beans seasoned with garlic and cumin add depth to your meal.
- Chili Lime Corn on the Cob: Grilled corn brushed with chili powder and lime juice offers a sweet and spicy flavor combination.
- Garden Salad: A simple salad with mixed greens, tomatoes, and avocado provides freshness alongside richer dishes.
- Queso Dip & Tortilla Chips: Melted cheese dip served with crispy tortilla chips is always a crowd-pleaser.
- Grilled Vegetables: Assorted vegetables grilled until tender bring color and a healthy touch to your plate.
- Cilantro Lime Quinoa: This light side dish offers a nutty flavor while keeping things fresh with cilantro and lime.
Common Mistakes to Avoid
When making Baked Chicken Chimichanga, it’s easy to overlook some key steps. Here are common mistakes to avoid:
- Overfilling the tortillas: Filling your tortillas too much can cause them to burst while baking. Use just enough filling to roll them up securely.
- Skipping the melting butter: Brushing the tops with melted butter helps achieve a golden, crispy texture. Don’t skip this step for best results.
- Not preheating the oven: Preheating ensures even cooking and browning. Always set your oven before starting the preparation.
- Ignoring spice adjustments: Each person’s spice tolerance varies. Adjust jalapeño quantity based on your preference for heat.
- Failing to let them cool before serving: Allowing chimichangas to cool slightly helps them firm up, making them easier to handle and eat.
Storage & Reheating Instructions
Refrigerator Storage
- Store Baked Chicken Chimichanga in an airtight container.
- They will last for 3-4 days in the refrigerator.
Freezing Baked Chicken Chimichanga
- Wrap each chimichanga tightly in plastic wrap or aluminum foil.
- Freeze for up to 2-3 months for best quality.
Reheating Baked Chicken Chimichanga
- Oven: Preheat to 350°F and bake for about 15-20 minutes until heated through.
- Microwave: Heat individually on high for 1-2 minutes or until warm, but expect a softer texture.
- Stovetop: Heat in a skillet over medium heat, turning occasionally until warmed through and crispy.
Frequently Asked Questions
Here are some common questions people have about Baked Chicken Chimichanga:
Can I use other proteins in Baked Chicken Chimichanga?
Yes, you can substitute chicken with ground turkey or beef if desired.
How do I make my chimichangas spicier?
To add more heat, include additional jalapeños or even some cayenne pepper in the filling.
How can I customize my Baked Chicken Chimichanga?
Feel free to add veggies like bell peppers or corn for extra flavor and texture.
What toppings work well with Baked Chicken Chimichanga?
Great toppings include sour cream, guacamole, salsa, or shredded lettuce.
Can I make these vegan?
Yes! Substitute chicken with plant-based protein and use dairy-free cheese.
Final Thoughts
Baked Chicken Chimichanga is a delightful twist on a classic Mexican dish that brings both flavor and simplicity. Its versatility allows you to customize the fillings and toppings according to your taste preferences. Whether enjoyed as a quick weeknight dinner or a special weekend treat, this recipe is sure to please everyone at your table!
Baked Chicken Chimichanga

Baked Chicken Chimichangas are a delicious and healthier twist on the classic Mexican favorite. These crispy, oven-baked treats are filled with tender shredded chicken, creamy refried beans, zesty salsa, and gooey cheese, all wrapped in soft tortillas. Perfect for busy weeknights or gatherings, this easy chimichanga recipe is customizable to suit your taste buds. Whether you prefer it spicy or mild, these chimichangas promise a burst of flavor in every bite. Serve them with your favorite toppings like sour cream and guacamole for a satisfying meal that everyone will love!
- Prep Time: 15 minutes
- Cook Time: 25 minutes
- Total Time: 40 minutes
- Yield: Serves 6
- Category: Dinner
- Method: Baking
- Cuisine: Mexican
Ingredients
- 2 cups cooked shredded chicken
- 1 1/3 cup refried beans
- 1 1/3 cup salsa
- 1 cup shredded cheese (cheddar or Mexican blend)
- 6 large taco-sized flour tortillas
- 3 tablespoons melted butter
Instructions
- Preheat your oven to 400°F.
- In a large mixing bowl, combine cooked shredded chicken, refried beans, salsa, cheese, and any desired spices.
- Spread filling on each tortilla and roll tightly to form burrito shapes.
- Place seam-side down on a baking sheet and brush the tops with melted butter.
- Bake for 15 minutes, flip them over, then bake for an additional 10 minutes until golden brown.
Nutrition
- Serving Size: 1 serving
- Calories: 310
- Sugar: 2g
- Sodium: 540mg
- Fat: 14g
- Saturated Fat: 7g
- Unsaturated Fat: 6g
- Trans Fat: 0g
- Carbohydrates: 30g
- Fiber: 5g
- Protein: 18g
- Cholesterol: 55mg