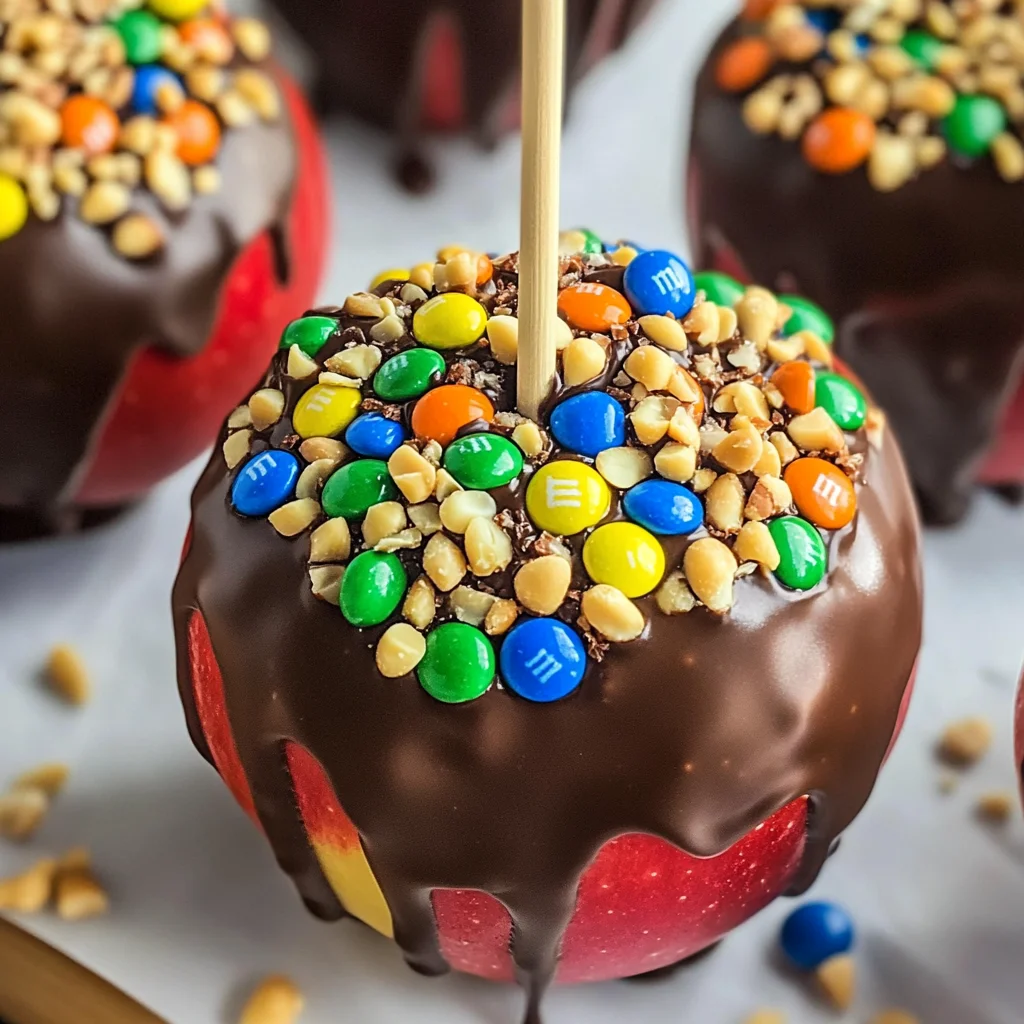
Chocolate Covered Apples
Chocolate-covered apples are a delightful treat that brings together the sweetness of chocolate with the crispness of fresh apples. Perfect for Halloween, parties, or simply satisfying a sweet tooth, these treats are versatile and easy to customize. With a simple melting process and endless topping options, you’ll find that chocolate-covered apples are not only fun to make but also a hit among guests of all ages.
Why You’ll Love This Recipe
- Simple to Prepare: With just a few steps and minimal ingredients, making chocolate-covered apples is quick and hassle-free.
- Customizable Toppings: Choose from a variety of toppings like nuts, candies, or sprinkles to create your perfect treat.
- Perfect for Any Occasion: Whether it’s Halloween or a casual snack, these treats fit right in.
- Kid-Friendly Fun: Kids love dipping and decorating their own apples, making it a fun family activity.
- Deliciously Sweet and Tart: The combination of rich chocolate and tart apples creates a delightful flavor contrast.
Tools and Preparation
To create the perfect chocolate-covered apples, having the right tools is essential. This will ensure a smooth process from start to finish.
Essential Tools and Equipment
- Baking sheet
- Parchment paper
- Microwave-safe bowl
- Wooden popsicle sticks or skewers
Importance of Each Tool
- Baking sheet: Provides a flat surface for cooling the coated apples without mess.
- Parchment paper: Prevents sticking and makes cleanup easy after the chocolate sets.
- Microwave-safe bowl: Ensures safe melting of chocolate without burning while being large enough to dip the apples.
Ingredients
For this recipe, you will need the following ingredients:
For the Apples
- 6-8 small or medium apples
For the Chocolate Coating
- 1 cup semi-sweet chocolate chips (or chopped chocolate; vegan chocolate if desired)
- 1 tablespoon refined coconut oil
For Toppings
- 1/2 cup candy (mini M&Ms recommended)
- 1/2 cup peanuts (very finely chopped)
Additional Items
- Wooden popsicle sticks or skewers
How to Make Chocolate Covered Apples
Step 1: Prepare Your Baking Sheet
Prepare a baking sheet by lining it with parchment paper. This will keep your coated apples from sticking.
Step 2: Wash the Apples
Wash and thoroughly dry each apple. It’s crucial that they are completely dry so that the chocolate adheres properly.
Step 3: Insert Sticks
Insert a wooden popsicle stick into the top of each apple. Push it down almost all the way for stability.
Step 4: Melt the Chocolate
In a microwave-safe bowl, combine the semi-sweet chocolate chips and coconut oil. Heat in the microwave at half power in 30-second intervals, stirring between each interval until melted and smooth.
Step 5: Dip and Decorate
Hold an apple by its stick and dip it into the melted chocolate. Turn it to coat evenly and let excess chocolate drip off. While holding the dipped apple, sprinkle your chosen toppings over it before the chocolate hardens.
Step 6: Set in Refrigerator
Place your coated apples on the prepared baking sheet. Refrigerate them for about 30 minutes or until the chocolate is fully set.
Step 7: Store Leftovers
If you have uncut coated apples left over, store them in an airtight container at room temperature for up to three days or refrigerate for up to one week.
How to Serve Chocolate Covered Apples
Chocolate covered apples are not only a delicious treat but also a fun dessert that can be served in various ways. Here are some creative serving suggestions to enhance your experience.
Individual Treats
- Serve each chocolate covered apple on its own on a small plate for a simple, elegant presentation.
Party Platter
- Arrange several chocolate covered apples on a large platter, garnished with extra toppings like sprinkles or nuts for visual appeal.
Dessert Bar
- Set up a dessert bar with different toppings and sauces where guests can customize their chocolate covered apples.
On Sticks
- Serve the apples still on the sticks for easy handling, perfect for parties or gatherings.
Dipped Slices
- Offer sliced chocolate covered apples for an easy-to-eat option. Simply cut the apples into wedges before dipping them in chocolate.
How to Perfect Chocolate Covered Apples
Getting your chocolate covered apples just right can elevate this treat from good to exceptional. Follow these tips to ensure perfect results every time.
- Choose the Right Apples: Select firm, crisp apples like Granny Smith or Honeycrisp for the best texture and flavor contrast.
- Dry Thoroughly: Make sure the apples are completely dry before dipping; moisture can cause the chocolate to slide off.
- Use Quality Chocolate: Opt for high-quality semi-sweet or vegan chocolate for a smoother melt and better taste.
- Control Temperature: Melt chocolate at half power in intervals to prevent burning and achieve a smooth consistency.
- Chill Between Dips: If layering chocolates or toppings, refrigerate between dips to set layers quickly without blending them.
- Experiment with Toppings: Don’t hesitate to try different toppings like crushed cookies, coconut flakes, or seeds for added texture and flavor.
Best Side Dishes for Chocolate Covered Apples
Pairing side dishes with chocolate covered apples can create a delightful dessert spread. Here are some tasty options to consider:
- Caramel Sauce – A rich and sweet addition that complements the tartness of the apples beautifully.
- Nut Butter – Serve almond or peanut butter as a dip for an extra protein boost alongside the sweetness of chocolate.
- Fruit Salad – A refreshing mix of seasonal fruits balances out the richness of the chocolate and adds color to your plate.
- Vanilla Ice Cream – The creamy texture of ice cream provides a delicious contrast to the crunchy coated apples.
- Cheese Platter – Include mild cheeses like brie or cream cheese that pair well with sweet treats.
- Popcorn – Offer salted popcorn as a light, crunchy side that contrasts nicely with the sweet flavors of chocolate-covered apples.
- Yogurt Parfait – Layer yogurt with granola and fresh fruit for a healthy option that complements your dessert theme.
- Chocolate Fondue – For true chocoholics, serve additional melted chocolate alongside fruits and pretzels for dipping fun!
Common Mistakes to Avoid
When making chocolate covered apples, it’s easy to overlook some key steps. Here are common mistakes to avoid for perfect results.
- Not drying the apples properly – Ensure apples are completely dry after washing to help the chocolate adhere better.
- Using low-quality chocolate – Opt for high-quality semi-sweet or vegan chocolate for a richer taste and smoother coating.
- Overheating the chocolate – Melt chocolate at half power in intervals to prevent burning; stir frequently for even melting.
- Skipping refrigeration – Refrigerate coated apples for at least 30 minutes to set the chocolate, ensuring a firm finish.
- Ignoring toppings timing – Add toppings immediately after dipping; if the chocolate is too thin, refrigerate briefly before adding.

Storage & Reheating Instructions
Refrigerator Storage
- Store in an airtight container to maintain freshness.
- Keep at room temperature for up to 3 days or in the refrigerator for up to a week.
Freezing Chocolate Covered Apples
- Wrap each apple individually in plastic wrap or place in a freezer-safe container.
- They can be frozen for up to 3 months.
Reheating Chocolate Covered Apples
- Oven – Preheat to low temperature; place apples on a baking sheet until just warmed through.
- Microwave – Heat in short intervals (5-10 seconds) until slightly warm; be careful not to melt the chocolate.
- Stovetop – Use a double boiler method on low heat; warm gently while monitoring closely.
Frequently Asked Questions
Here are answers to some common questions about making chocolate covered apples.
How do I prepare the apples for dipping?
Wash and dry your apples thoroughly before dipping them into melted chocolate. This ensures a good coating.
Can I use different types of chocolate?
Yes! You can use dark, milk, or vegan chocolate chips based on your preference. Each will give a unique flavor profile.
What toppings can I use for my Chocolate Covered Apples?
You can customize your treats with various toppings such as nuts, sprinkles, crushed cookies, or dried fruits for added texture and flavor.
How long do Chocolate Covered Apples last?
They can stay fresh at room temperature for about 3 days or refrigerated for up to a week when stored properly.
Can I make these ahead of time?
Absolutely! You can prepare them in advance and store them correctly as mentioned above. Just allow time for them to set before serving.
Final Thoughts
Chocolate covered apples are not only festive but also versatile. You can customize them with various toppings and enjoy them for any occasion. Give this fun recipe a try, and let your creativity shine!
Chocolate Covered Apples

Indulge in the delightful world of Chocolate Covered Apples, a charming treat that merges the rich flavor of chocolate with the fresh crunch of apples. Ideal for any occasion—be it Halloween, parties, or just a sweet craving—these chocolate-dipped delights are endlessly customizable. With their vibrant toppings and simple preparation process, they become an interactive and enjoyable dessert for families and guests alike. Follow this easy recipe to create your very own chocolate-covered masterpiece, perfect for sharing or enjoying solo.
- Prep Time: 15 minutes
- Cook Time: 5 minutes
- Total Time: 20 minutes
- Yield: Makes approximately 8 servings (8 apples) 1x
- Category: Dessert
- Method: Baking
- Cuisine: American
Ingredients
- 6–8 small or medium apples
- 1 cup semi-sweet chocolate chips (or chopped chocolate; vegan chocolate if desired)
- 1 tablespoon refined coconut oil
- 1/2 cup candy (mini M&Ms recommended)
- 1/2 cup finely chopped peanuts
- Wooden popsicle sticks or skewers
Instructions
- Line a baking sheet with parchment paper for easy cleanup.
- Wash and thoroughly dry each apple.
- Insert a wooden stick into the top of each apple.
- Melt the chocolate chips and coconut oil in a microwave-safe bowl, stirring until smooth.
- Dip each apple into the melted chocolate, allowing excess to drip off, then sprinkle on toppings before the chocolate sets.
- Place the dipped apples onto the prepared baking sheet and refrigerate for about 30 minutes until set.
- Store any leftovers in an airtight container at room temperature for up to three days or in the refrigerator for one week.
Nutrition
- Serving Size: 1 chocolate-covered apple (approx. 120g)
- Calories: 210
- Sugar: 22g
- Sodium: 10mg
- Fat: 10g
- Saturated Fat: 6g
- Unsaturated Fat: 4g
- Trans Fat: 0g
- Carbohydrates: 30g
- Fiber: 3g
- Protein: 2g
- Cholesterol: 0mg