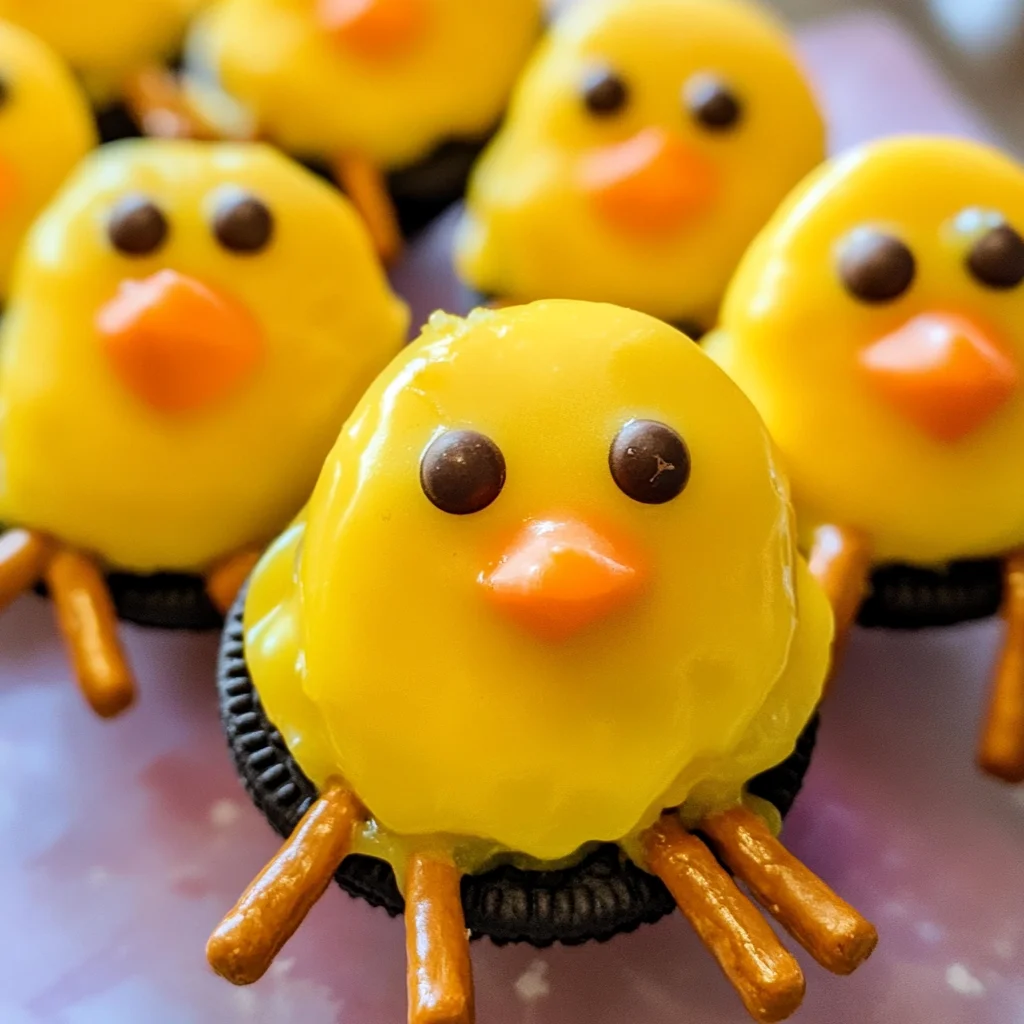
Oreo Easter Chicks
Oreo Easter Chicks are a delightful and creative treat that will bring joy to any Easter celebration. These fun and colorful snacks are not only easy to make but also appealing to kids and adults alike. With their cute chick appearance, they are perfect for parties, family gatherings, or as a festive dessert at home. Plus, the combination of Oreo cookies and yellow candy melts makes them irresistibly tasty!
Why You’ll Love This Recipe
- Fun to Make – These Oreo Easter Chicks are simple enough for kids to help with, making it a great family activity.
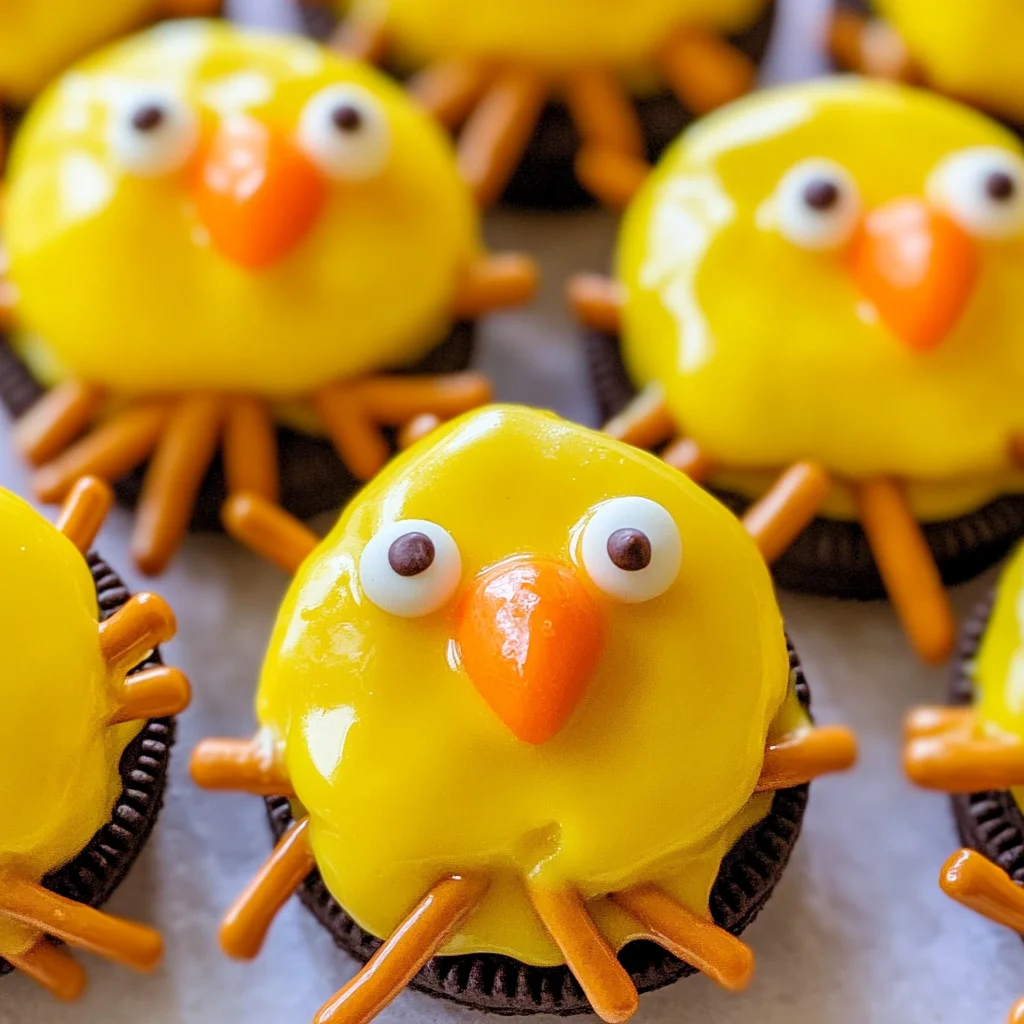
- Eye-Catching Appearance – The bright yellow and cute design make these treats a standout centerpiece for any Easter table.
- Tasty Combination – The blend of crunchy Oreos with sweet candy melts is a crowd-pleaser for all ages.
- Versatile Treats – You can customize them further by adding different colors or decorations for various occasions.
- Quick Preparation – With just 20 minutes of prep time, you can whip up a batch in no time.
Tools and Preparation
Before diving into this fun recipe, gather your essential tools to ensure a smooth process. Having everything ready will make preparing your Oreo Easter Chicks even easier.
Essential Tools and Equipment
- Baking sheet
- Wax paper
- Microwave-safe bowl
- Spoon or dipping fork
Importance of Each Tool
- Baking sheet – This is where you’ll set your dipped cookies to cool. A flat surface helps maintain their shape.
- Wax paper – It prevents sticking and makes cleanup easier when setting your dipped Oreos.
- Microwave-safe bowl – Essential for melting your candy melts evenly without burning them.
Ingredients
Oreo Easter Chicks are a super fun way to turn oreo cookies into a delicious Easter treat using yellow candy melts and pretzel sticks.
For the Chicks
- 1-2 bags yellow candy melts
- 1 package double-stuff oreos
- mini chocolate chips
- thin pretzel rods (broken into short pieces)
- orange decorating gel or orange candy melts
How to Make Oreo Easter Chicks
Step 1: Melt the Candy Melts
- Start by melting the yellow candy melts. Follow the package instructions for best results.
- Prepare a baking sheet with a piece of wax paper. This will be where you place your dipped cookies.
Step 2: Dip the Oreos
- Take each double-stuff Oreo and dip it into the melted yellow candy melts. Ensure it’s fully coated.
- Carefully lift the cookie out using a fork or spoon, allowing excess candy melt to drip off.
- Place the dipped cookie on the wax paper immediately.
Step 3: Add Features
- Quickly insert two broken pieces of pretzel rods into the bottom of each cookie for legs.
- Use two mini chocolate chips for eyes by pressing them gently into the top half of each cookie.
Step 4: Make Beaks
- To create beaks, use either orange decorating gel or melted orange candy melts. Apply small dots on each cookie’s front.
Step 5: Set and Serve
- Place your baking sheet in the refrigerator to allow the candy melt coating to harden.
- Once set, serve your adorable Oreo Easter Chicks at your next gathering!
How to Serve Oreo Easter Chicks
Oreo Easter Chicks are not just a delightful treat; they also make a fun centerpiece for any Easter gathering. Here are some creative ways to serve them that will add color and excitement to your celebration.
On a Decorative Platter
- Arrange the Oreo Easter Chicks on a vibrant platter. You can add colorful paper grass underneath for an extra festive look.
In Individual Cups
- Place each chick in small clear cups. This gives guests their own serving and makes cleanup easier.
As Party Favors
- Wrap each chick in cellophane and tie with a ribbon. These make adorable, edible party favors for guests to take home.
On a Cake Stand
- Stack the Oreo Easter Chicks on a tiered cake stand. This elevates the presentation and draws attention to your sweet treats.
How to Perfect Oreo Easter Chicks
Creating the perfect Oreo Easter Chicks requires a few tips that can elevate your treat-making skills. Here’s how you can ensure they turn out great every time.
-
Use fresh ingredients: Ensure your candy melts and cookies are fresh for the best flavor and texture.
-
Melt carefully: Melt yellow candy melts slowly in the microwave or over a double boiler to avoid burning them.
-
Be creative with eyes: Use different types of mini candies for eyes, such as M&Ms or Skittles, for a unique look.
-
Chill before serving: Refrigerate the chicks after decorating them to help set the candy coating firmly.
Best Side Dishes for Oreo Easter Chicks
Pairing side dishes with your Oreo Easter Chicks can enhance your festive spread. Here are some delightful options that complement these sweet treats beautifully.
- Fresh Fruit Salad: A mix of seasonal fruits adds brightness and freshness to balance the sweetness.
- Veggie Platter: Crunchy vegetables with hummus or ranch dip provide a savory contrast.
- Cheese Board: An assortment of cheeses, crackers, and nuts offers variety and pairs well with chocolate.
- Mini Sandwiches: Bite-sized sandwiches filled with chicken or turkey offer a hearty option alongside sweet treats.
- Deviled Eggs: Classic deviled eggs can be made festive by adding paprika or colorful toppings.
- Potato Wedges: Crispy potato wedges seasoned with herbs make for a tasty side that kids will love.
- Pasta Salad: A light pasta salad with veggies provides refreshing flavors that complement dessert nicely.
- Jello Cups: Colorful jello cups made with fruit juice provide another fun dessert option that fits the theme.
Common Mistakes to Avoid
When making Oreo Easter Chicks, there are a few common pitfalls that can derail your fun cooking process.
- Skipping the Wax Paper: Not using wax paper can lead to cookies sticking to your surface. Always line your baking sheet to ensure easy removal.
- Overheating Candy Melts: Melting candy melts too quickly can cause them to seize. Use low heat and follow package instructions for the best results.
- Not Working Quickly Enough: Once cookies are dipped in candy, you need to act fast to add decorations. Plan your steps ahead for smoother assembly.
- Uneven Coating: Failing to coat the Oreos evenly can result in an unattractive finish. Make sure each cookie is fully submerged for a consistent look.
- Ignoring Storage Tips: Not storing your chicks properly can affect their taste and texture. Follow storage guidelines closely to keep them fresh.
Storage & Reheating Instructions
Refrigerator Storage
- Store Oreo Easter Chicks in an airtight container.
- They can last up to 5 days in the refrigerator.
Freezing Oreo Easter Chicks
- You can freeze the chicks if needed.
- Store them in a freezer-safe container for up to 3 months.
Reheating Oreo Easter Chicks
- Oven: Preheat the oven to 350°F (175°C) and warm the chicks for about 5 minutes.
- Microwave: Heat on low power for 10-15 seconds. Watch closely as they can melt quickly.
- Stovetop: Place on a pan over low heat, flipping gently until warmed through.
Frequently Asked Questions
What are Oreo Easter Chicks?
Oreo Easter Chicks are delightful treats made by coating Oreos with yellow candy melts and decorating them like little chicks.
How do I customize my Oreo Easter Chicks?
You can customize these treats by using different colors of candy melts or adding various toppings like sprinkles or edible glitter.
Can I make Oreo Easter Chicks ahead of time?
Absolutely! You can prepare them a few days in advance and store them properly, ensuring they stay fresh and delicious.
Is there a vegan version of Oreo Easter Chicks?
Yes! Simply use vegan candy melts and ensure all other ingredients are plant-based for a vegan-friendly treat.
Final Thoughts
Oreo Easter Chicks are not only adorable but also versatile, making them perfect for various celebrations beyond Easter. Feel free to get creative with colors and decorations, ensuring everyone’s sweet tooth gets satisfied! Try this fun recipe today and delight your family and friends with these charming treats!
Oreo Easter Chicks
Oreo Easter Chicks are the perfect combination of fun and flavor, making them a delightful addition to any celebration. These adorable treats transform classic Oreos into charming little chicks, coated in bright yellow candy melts. Easy to make and perfect for kids of all ages, they not only serve as a sweet dessert but also as an eye-catching centerpiece for your festive gatherings. With just a few simple ingredients and minimal prep time, you can create these playful snacks that are sure to bring smiles all around. Get creative by customizing colors and decorations to suit any occasion!
- Prep Time: 20 minutes
- Cook Time: 0 minutes
- Total Time: 20 minutes
- Yield: Approximately 12 servings 1x
- Category: Dessert
- Method: N/A
- Cuisine: N/A
Ingredients
- 1–2 bags yellow candy melts
- 1 package double-stuff Oreos
- mini chocolate chips
- thin pretzel rods (broken into short pieces)
- orange decorating gel or orange candy melts
Instructions
- Melt the yellow candy melts according to package instructions.
- Prepare a baking sheet lined with wax paper.
- Dip each double-stuff Oreo into the melted candy until fully coated. Allow excess to drip off before placing on wax paper.
- Quickly insert broken pretzel pieces into the bottom of each cookie for legs.
- Gently press mini chocolate chips into the top half for eyes.
- Use orange decorating gel or melted orange candy melts to create small dots for beaks.
- Chill in the refrigerator until set, then serve.
Nutrition
- Serving Size: 1 cookie (30g)
- Calories: 150
- Sugar: 15g
- Sodium: 50mg
- Fat: 7g
- Saturated Fat: 4g
- Unsaturated Fat: 3g
- Trans Fat: 0g
- Carbohydrates: 20g
- Fiber: 0g
- Protein: 1g
- Cholesterol: 0mg