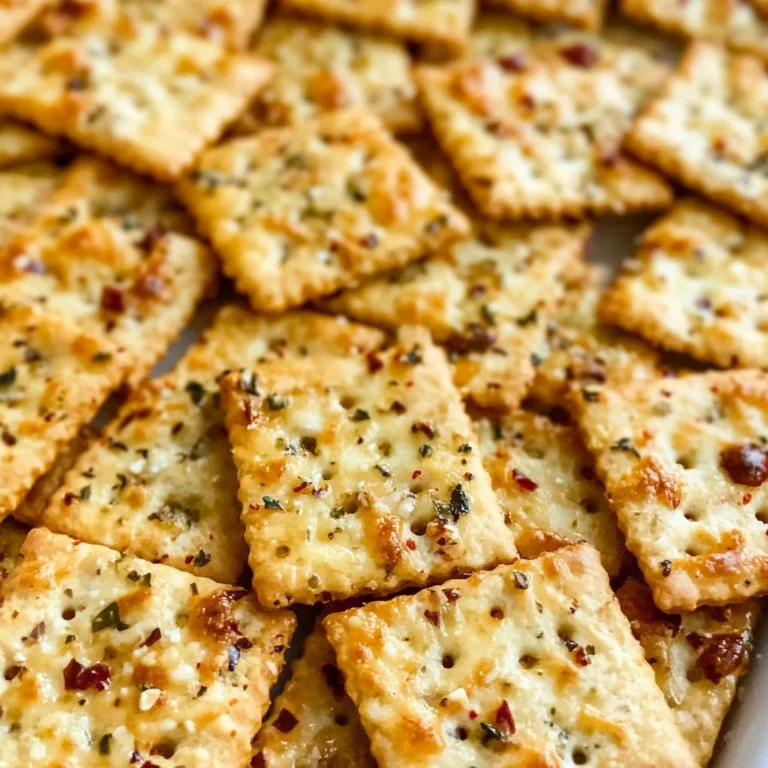
Road Trip Snack Mix
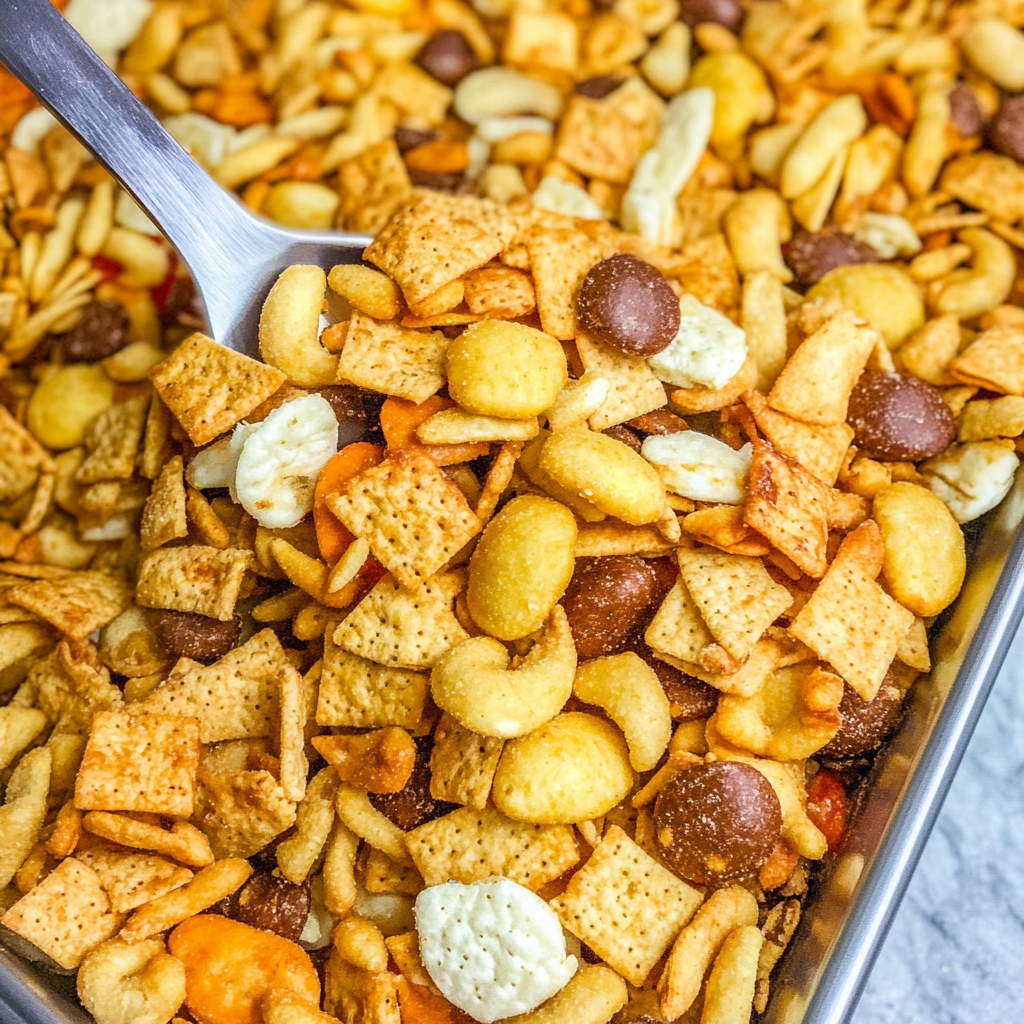
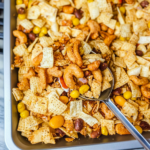
What’s the most important thing to remember on a long road trip? The snacks, of course! This Road Trip Snack Mix is a delightful blend of Goldfish crackers, oyster crackers, pretzels, Cheez-Its, and Bugles, all seasoned with a zesty spice mix. Perfect for sharing or enjoying solo, this snack mix is hard to resist. With its versatility for various occasions—road trips, parties, or just a cozy night in—it’s an essential recipe to have on hand.
Why You’ll Love This Recipe
- Easy to Make: With minimal prep and cook time, you’ll have a tasty snack ready in no time.
- Flavor Packed: The zesty seasoning blend elevates classic snacks into something special.
- Versatile Use: Perfect for road trips, parties, or as an everyday munchie.
- Long Lasting: Store it in an airtight container for up to two weeks without losing freshness.
- Crowd Pleaser: Great for gatherings; it’s hard to stop at just one handful!
Tools and Preparation
Before you start making your Road Trip Snack Mix, gather your tools. Having everything ready makes the process smooth and enjoyable.
Essential Tools and Equipment
- Large mixing bowl
- Measuring cups and spoons
- Whisk
- Parchment paper
- Sheet pan
Importance of Each Tool
- Large mixing bowl: Provides ample space for combining all ingredients without mess.
- Whisk: Ensures that the olive oil and seasonings are thoroughly mixed for even flavor distribution.
Ingredients
For the Seasoning Mix
- 1/2 cup olive oil (or melted unsalted butter)
- 1 ounce packet ranch dry seasoning mix
- 1 tsp mustard powder
- 1 tsp dill
- 1/2 tbsp garlic powder
For the Snack Base
- 3 cups Goldfish Crackers
- 16 Oz box of Cheez-Its Duo Cheddar and Parmesan flavor
- 14.5 Oz bag Bugles Corn Chips
- 3 cups Mini twisted pretzels (or pretzel sticks)
- 16 oz bag oyster crackers
How to Make Road Trip Snack Mix
Step 1: Preheat the Oven
Preheat your oven to 275°F (135°C). This temperature allows the snack mix to bake evenly without burning.
Step 2: Prepare Your Pans
Line a large 15×22 rimmed sheet pan or two smaller 11×17 sheet pans with parchment paper. This prevents sticking and makes cleanup easier.
Step 3: Whisk Together the Seasoning
In a small bowl or measuring cup:
1. Combine olive oil with ranch seasoning mix, mustard powder, dill, and garlic powder.
2. Whisk until well blended.
Step 4: Combine Snacks in a Bowl
In a large mixing bowl:
1. Add Goldfish crackers, Cheez-Its, Bugles, pretzels, and oyster crackers.
2. Toss gently until mixed.
Step 5: Coat the Snack Mixture
Pour the olive oil mixture over the combined snacks:
1. Stir well until every piece is coated evenly with the seasoning.
Step 6: Bake the Snack Mix
Transfer the coated snack mix onto your prepared sheet pan(s):
1. Spread it into a single layer.
2. Bake in preheated oven for about 15 minutes.
Step 7: Cool and Store
Once baked:
1. Remove from oven and let cool completely on the pan.
2. Store in an airtight container for up to two weeks.
Enjoy your homemade Road Trip Snack Mix on your next adventure or as a delicious treat at home!
How to Serve Road Trip Snack Mix
The perfect way to enjoy your homemade Road Trip Snack Mix is by pairing it with various serving suggestions that enhance the experience. Whether you’re on the road or hosting a gathering, these ideas will take your snack mix to the next level.
In Individual Bags
- Use small paper bags or resealable plastic bags for easy transport. This keeps portions controlled and makes sharing convenient.
As a Party Bowl
- Serve the snack mix in a large bowl at parties or gatherings. Guests can help themselves, making it a great finger food option.
With Dips
- Pair your snack mix with dips like hummus or guacamole. The creamy textures contrast nicely with the crunch of the mix.
On a Charcuterie Board
- Incorporate the snack mix into a charcuterie board alongside cheese, fruits, and nuts for a delightful variety of flavors and textures.
For Movie Nights
- Create an enjoyable movie night experience by serving your Road Trip Snack Mix in popcorn buckets. A fun twist that everyone will love!
How to Perfect Road Trip Snack Mix
Creating the ultimate Road Trip Snack Mix is all about balancing flavors and textures. Follow these tips to enhance your recipe and make it even more enjoyable.
- Use Fresh Ingredients: Fresh crackers and chips will keep your snack mix crisp and delicious.
- Customize Seasonings: Experiment with different spices like paprika or cayenne for an extra kick.
- Mix Textures: Combine crunchy items with softer snacks like chocolate-covered pretzels for variety.
- Store Properly: Keep your snack mix in an airtight container to maintain freshness and avoid sogginess.
- Double Batch: Make extra for gatherings or road trips. It disappears fast!
- Add Nuts: Incorporate nuts like almonds or cashews for added protein and healthy fats.
Best Side Dishes for Road Trip Snack Mix
When enjoying your Road Trip Snack Mix, consider serving it with complementary side dishes that enhance its flavors. Here are some delicious options:
- Veggie Platter: A colorful assortment of fresh vegetables like carrots, bell peppers, and cucumbers paired with ranch dressing.
- Fruit Skewers: Easy-to-eat fruit skewers with strawberries, grapes, and melon add sweetness to balance the savory mix.
- Pita Chips: Crunchy pita chips provide a delightful alternative to crackers while complementing dips.
- Cheese Cubes: Bite-sized cheese cubes offer a savory contrast that pairs well with the seasoned snack mix.
- Popcorn: Lightly salted popcorn adds another crunchy element that everyone loves at gatherings.
- Mini Sandwiches: Small sandwiches filled with turkey or chicken provide heartiness that complements the snack mix.
- Guacamole & Tortilla Chips: Creamy guacamole served with crispy tortilla chips is always a crowd favorite.
- Fruit Salad: A refreshing fruit salad can cleanse the palate between bites of savory snacks and keep things light.
Common Mistakes to Avoid
Avoiding mistakes when making your Road Trip Snack Mix will ensure a tasty outcome. Here are some common errors to watch out for:
- Over-seasoning: Adding too much seasoning can overpower the mix. Start with the recommended amounts and adjust to taste.
- Not mixing well: Failing to coat the snacks evenly will lead to some bites being bland. Take your time to mix thoroughly for a consistent flavor.
- Skipping the baking step: This recipe benefits from a brief bake to enhance flavors and crunchiness. Don’t skip this crucial step!
- Storing improperly: If not stored correctly, your snack mix can lose its crunch. Use an airtight container to keep it fresh.
- Using stale ingredients: Ensure all snacks are fresh before mixing. Stale crackers or chips will affect the overall quality of your Road Trip Snack Mix.
Storage & Reheating Instructions
Refrigerator Storage
- Store in an airtight container for up to 2 weeks.
- Keep in a cool, dry place away from sunlight.
Freezing Road Trip Snack Mix
- You can freeze the snack mix for up to 3 months.
- Use freezer-safe containers or bags to prevent moisture.
Reheating Road Trip Snack Mix
- Oven: Preheat oven to 275°F and spread the mix on a baking sheet. Bake for about 10 minutes to refresh its crunch.
- Microwave: Place in a microwave-safe bowl and heat in short bursts (15-20 seconds), stirring in between until warm.
- Stovetop: Heat on low in a skillet, stirring frequently until warmed through.
Frequently Asked Questions
Here are some common questions about the Road Trip Snack Mix:
What ingredients are in Road Trip Snack Mix?
The Road Trip Snack Mix includes Goldfish crackers, Cheez-Its, Bugles, pretzels, oyster crackers, olive oil, ranch seasoning, and various spices.
Can I customize the Road Trip Snack Mix?
Absolutely! Feel free to add nuts, dried fruits, or your favorite crackers for a personal touch.
How should I store my Road Trip Snack Mix?
Store it in an airtight container at room temperature for up to 2 weeks or freeze it for longer storage.
What can I serve with Road Trip Snack Mix?
This snack mix pairs well with dips like hummus or salsa for an extra tasty treat during your road trips.
How long does it take to prepare Road Trip Snack Mix?
The total time from prep to ready-to-eat is about 28 minutes!
Final Thoughts
This Road Trip Snack Mix is not just delicious but also versatile. It’s perfect for sharing during gatherings or fueling your adventures on the road. Plus, you can easily customize it with your favorite snacks! Give this recipe a try and enjoy a delightful snack experience.
Road Trip Snack Mix
Get ready for your next adventure with this delightful Road Trip Snack Mix! Combining a variety of crunchy snacks like Goldfish crackers, Cheez-Its, Bugles, pretzels, and oyster crackers, this mix is seasoned with a zesty blend that elevates every bite. Perfect for road trips, parties, or cozy nights at home, it’s easy to make and hard to resist. Just pack it up in individual bags for traveling or serve it in a large bowl for gatherings—it’s sure to please everyone!
- Prep Time: 10 minutes
- Cook Time: 15 minutes
- Total Time: 25 minutes
- Yield: About 8 servings 1x
- Category: Snack
- Method: Baking
- Cuisine: American
Ingredients
- 1/2 cup olive oil
- 1 ounce ranch dry seasoning mix
- 3 cups Goldfish crackers
- 16 oz Cheez-Its Duo Cheddar and Parmesan flavor
- 14.5 oz Bugles Corn Chips
- 3 cups mini twisted pretzels
- 16 oz oyster crackers
Instructions
- Preheat the oven to 275°F (135°C).
- Line a large sheet pan with parchment paper.
- In a small bowl, whisk together olive oil and ranch seasoning mix until blended.
- In a large mixing bowl, combine Goldfish crackers, Cheez-Its, Bugles, pretzels, and oyster crackers; toss gently.
- Pour the olive oil mixture over the snack mix and stir until evenly coated.
- Spread the mixture in a single layer on the prepared sheet pan.
- Bake for about 15 minutes or until lightly toasted.
- Allow to cool completely before storing in an airtight container.
Nutrition
- Serving Size: 1 cup (50g)
- Calories: 240
- Sugar: 1g
- Sodium: 410mg
- Fat: 12g
- Saturated Fat: 2g
- Unsaturated Fat: 10g
- Trans Fat: 0g
- Carbohydrates: 29g
- Fiber: 2g
- Protein: 4g
- Cholesterol: 0mg