Spooky Halloween Marble Cake
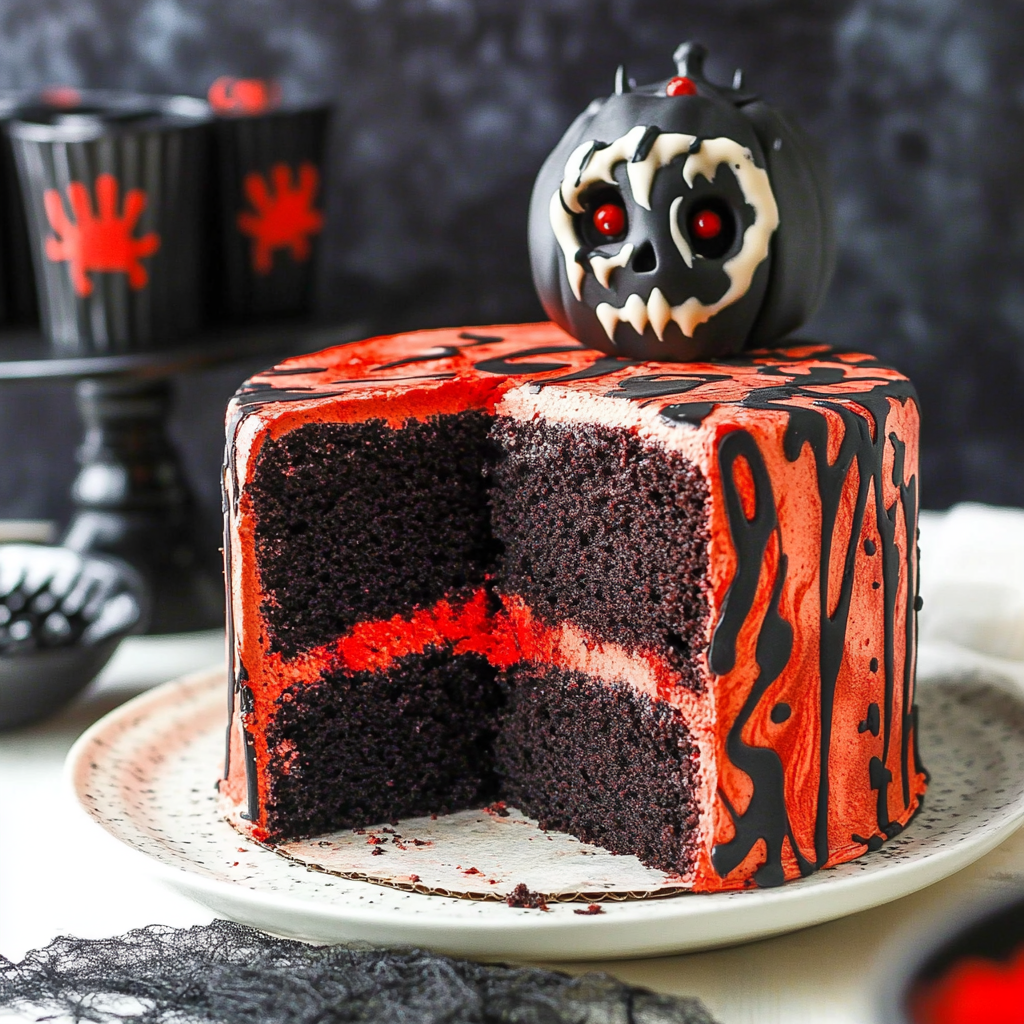
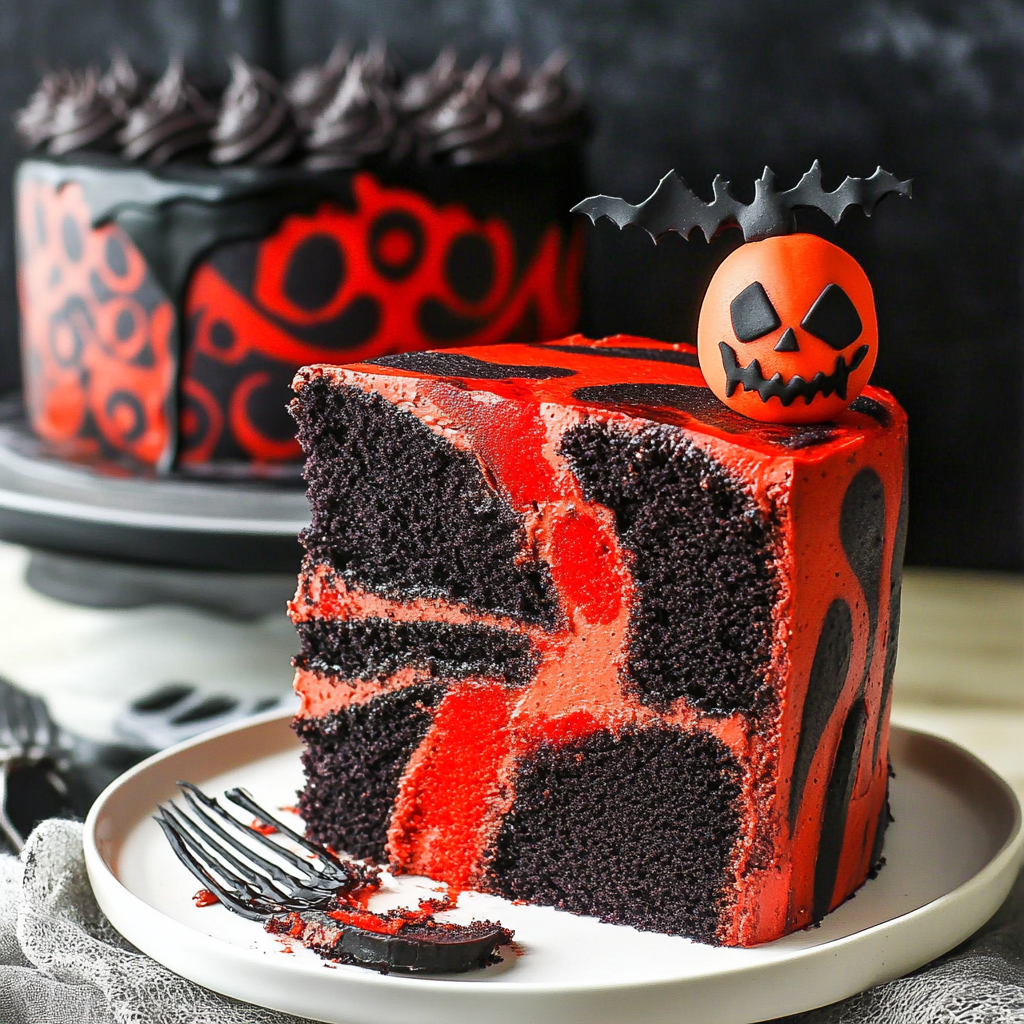
This Spooky Halloween Marble Cake is the ultimate treat for your Halloween gatherings! With its striking red and black marbled design, this cake not only delights the eyes but also tempts the taste buds. The addition of drippy red blood frosting and spooky sprinkles makes it a showstopper at any party. Perfect for both kids and adults, this cake captures the spirit of Halloween while offering a deliciously moist texture.
Why You’ll Love This Recipe
- Eye-catching Design: The red and black marble effect creates a visually stunning dessert that is sure to impress your guests.
- Flavorful Layers: Combining rich chocolate with vanilla ensures every bite is deliciously indulgent.
- Fun to Decorate: Let your creativity shine as you decorate with spooky toppings like blood and creepy sprinkles.
- Perfect for Any Occasion: This cake is not just for Halloween; it can be enjoyed at any festive gathering or celebration.
- Easy to Follow: The step-by-step instructions make baking this cake straightforward, even for beginners.
Tools and Preparation
To create your Spooky Halloween Marble Cake, you’ll need a few essential tools to ensure everything goes smoothly. Having the right equipment can make all the difference in achieving that perfect bake.
Essential Tools and Equipment
- 9-inch round cake pans
- Mixing bowls
- Electric mixer
- Rubber spatula
- Cooling rack
Importance of Each Tool
- 9-inch round cake pans: These provide the perfect shape and size for even baking and stacking.
- Electric mixer: Saves time and effort when mixing batter, ensuring a light and fluffy texture.
- Cooling rack: Allows your cake to cool evenly, preventing sogginess on the bottom.
Ingredients
For the Cake Batter
- 2 1/4 cups (293g) all purpose flour
- 2 1/2 tsp baking powder
- 1/4 tsp baking soda
- 1/2 tsp salt
- 1/2 cup (112g) unsalted butter, room temperature
- 1/2 cup vegetable oil
- 1 1/2 cups (310g) sugar
- 1 tbsp vanilla extract
- 4 large eggs
- 1 cup (240ml) buttermilk
- 5 oz bittersweet chocolate (60% cacao), chopped
For the Frosting
- 2 1/4 cups (504g) unsalted butter
- 8 cups (920g) powdered sugar
- 1 cup (114g) natural unsweetened cocoa powder
- 2 tsp vanilla extract
- 5-7 tbsp (75-105ml) water or cream
- 1/4 tsp salt
For Decorating
- Black gel icing color
- Red gel icing color
- 4 oz red Wilton candy melts
- 2 tbsp heavy whipping cream
- Sprinkles (see notes)
How to Make Spooky Halloween Marble Cake
Step 1: Preheat the Oven
Preheat your oven to 350°F (175°C). Grease and flour two 9-inch round cake pans to ensure your cake releases easily after baking.
Step 2: Prepare the Cake Batter
In a large mixing bowl:
1. Combine flour, baking powder, baking soda, and salt. Whisk together until well mixed.
2. In another bowl, cream together the unsalted butter, vegetable oil, and sugar until light and fluffy using an electric mixer.
3. Add vanilla extract and eggs one at a time, mixing well after each addition.
4. Gradually add dry ingredients while alternating with buttermilk until fully combined.
Step 3: Create the Marble Effect
Divide the batter into two bowls:
1. In one bowl, melt bittersweet chocolate in the microwave or over a double boiler until smooth. Stir into one portion of batter until fully blended.
2. Add black gel icing color to achieve a deep color in one bowl of batter.
3. In another bowl, add red gel icing color to achieve a vibrant hue.
Step 4: Layering for Marbling
Pour spoonfuls of each colored batter into prepared pans randomly:
1. Use a knife or skewer to swirl them together gently without fully mixing them.
Step 5: Bake the Cakes
Bake in preheated oven for about 20 minutes or until a toothpick inserted comes out clean. Allow cakes to cool in pans for about 10 minutes before transferring them to cooling racks.
Step 6: Prepare Frosting
In a large bowl:
1. Beat together unsalted butter until creamy.
2. Gradually add powdered sugar and cocoa powder while mixing on low speed.
3. Add vanilla extract, salt, and just enough water or cream until desired consistency is achieved.
Step 7: Assemble & Decorate
Once cakes are completely cooled:
1. Place one layer on a serving plate; spread frosting evenly on top.
2. Add the second layer on top and frost around sides and top as desired.
3. Melt red candy melts with heavy whipping cream; drizzle over cake as blood.
4. Finish with bloody eyeball sprinkles for added spookiness!
How to Serve Spooky Halloween Marble Cake
Serving your Spooky Halloween Marble Cake can be as fun and festive as its appearance! Here are some creative ways to present this delicious treat that will wow your guests at any Halloween gathering.
Festive Plate Presentation
- Use a dark or themed serving platter to enhance the spooky vibe.
- Garnish with edible fake spider webs or plastic spiders for an eerie touch.
Individual Portions
- Slice the cake into individual servings and place them on spooky-themed dessert plates.
- Top each slice with a dollop of whipped cream and a sprinkle of Halloween-themed sprinkles.
Cake Pop Version
- Transform leftover cake into cake pops by crumbling it, mixing with frosting, and dipping in melted candy melts.
- Decorate with spooky faces using icing to match the Halloween theme.
Accompanying Drinks
- Serve with themed beverages like black lemonade or fruit punch with floating eyeball ice cubes.
- Use clear cups to showcase colorful drinks that contrast with the dark cake.
Trick-or-Treat Boxes
- Package slices in small trick-or-treat boxes for guests to take home.
- Add a personalized note or spooky sticker for an extra special touch.
How to Perfect Spooky Halloween Marble Cake
To ensure your Spooky Halloween Marble Cake turns out perfectly every time, follow these handy tips.
- Use room temperature ingredients: This helps create a smooth batter, ensuring even baking.
- Don’t overmix the batter: Mix only until ingredients are combined to keep the cake light and fluffy.
- Properly measure flour: Spoon flour into your measuring cup and level it off to avoid dense cake from too much flour.
- Swirl colors gently: When marbling, use a skewer or knife and swirl gently for a perfect blend without losing distinct colors.
- Cool completely before decorating: Let the cake cool fully so that frosting doesn’t melt off when applied.
- Experiment with decorations: Get creative! Use various colors and edible decorations to make your cake stand out.
Best Side Dishes for Spooky Halloween Marble Cake
Pairing side dishes with your Spooky Halloween Marble Cake can elevate your dessert table. Here are some delightful options that complement the flavors while keeping up with the festive spirit.
- Pumpkin Soup: A warm, creamy pumpkin soup can serve as a comforting start before indulging in dessert.
- Cheesy Garlic Breadsticks: These savory sticks add a nice contrast to the sweetness of the marble cake.
- Roasted Vegetable Platter: Seasonal roasted veggies bring both color and nutrition, balancing out the treat’s richness.
- Crispy Apple Slices: Fresh apple slices drizzled with caramel dip create a refreshing side that pairs well with sweet desserts.
- Spicy Nachos: A platter of nachos topped with cheese and jalapeños offers a spicy kick amidst all the sweetness.
- Mini Salads: Individual salads dressed in a light vinaigrette can cleanse the palate between bites of cake.
Common Mistakes to Avoid
Baking a Spooky Halloween Marble Cake can be fun, but a few common mistakes can ruin your spooky creation. Here’s how to avoid them.
- Incorrect oven temperature: Always preheat your oven before baking. Using the wrong temperature can lead to uneven baking or a collapsed cake.
- Overmixing the batter: Mixing too much can make your cake dense. Mix just until combined to keep it light and fluffy.
- Not measuring ingredients accurately: Baking requires precision. Use a kitchen scale or measuring cups for accurate measurements.
- Skipping the cooling time: Allow your cake to cool completely before frosting. Frosting a warm cake can cause it to melt and slide off.
- Neglecting decoration details: The spooky element comes from details. Take time to decorate with gel icing and sprinkles for the best visual impact.
Storage & Reheating Instructions
Refrigerator Storage
- Store leftover Spooky Halloween Marble Cake in an airtight container.
- It will remain fresh in the fridge for up to 5 days.
Freezing Spooky Halloween Marble Cake
- Wrap individual slices tightly in plastic wrap or aluminum foil.
- Freeze for up to 3 months for optimal freshness.
Reheating Spooky Halloween Marble Cake
- Oven: Preheat the oven to 350°F (175°C). Place slices on a baking sheet and heat for about 10 minutes.
- Microwave: Heat individual slices on medium power for 15-20 seconds or until warm.
- Stovetop: Use a non-stick skillet over low heat, covering it with a lid, and warm slices for about 5 minutes.
Frequently Asked Questions
Here are some common questions regarding the Spooky Halloween Marble Cake that might help you.
How do I achieve the best marble effect?
To get a beautiful marble effect, use a knife or skewer to swirl the chocolate batter into the vanilla batter gently. Avoid over-mixing!
Can I use different colors for my marble cake?
Absolutely! You can customize your Spooky Halloween Marble Cake by using various gel icing colors based on your theme or preference.
How can I make this cake gluten-free?
You can substitute all-purpose flour with a gluten-free blend designed for baking. Ensure all other ingredients are gluten-free as well.
What are some creative decorations for my Spooky Halloween Marble Cake?
Consider using candy eyes, gummy worms, or themed sprinkles alongside red blood icing for an extra spooky presentation!
Final Thoughts
The Spooky Halloween Marble Cake is not only visually stunning but also deliciously moist and fluffy. Its versatility allows you to personalize it with different flavors and decorations, making it ideal for any Halloween gathering. Try this recipe out and unleash your creativity!
Spooky Halloween Marble Cake
Get ready to impress your guests with a Spooky Halloween Marble Cake that combines a striking red and black design with delicious flavors. This eye-catching dessert features rich chocolate and vanilla layers, topped with a drippy red ‘blood’ frosting and fun spooky sprinkles. Perfect for Halloween parties or any festive gathering, this cake is not only visually stunning but also incredibly moist and flavorful. Easy to make, it’s suitable for bakers of all skill levels looking to add a dash of creativity to their dessert table!
- Prep Time: 30 minutes
- Cook Time: 20 minutes
- Total Time: 50 minutes
- Yield: Approximately 12 servings 1x
- Category: Dessert
- Method: Baking
- Cuisine: American
Ingredients
- 2 1/4 cups (293g) all purpose flour
- 2 1/2 tsp baking powder
- 1/4 tsp baking soda
- 1/2 tsp salt
- 1/2 cup (112g) unsalted butter, room temperature
- 1/2 cup vegetable oil
- 1 1/2 cups (310g) sugar
- 1 tbsp vanilla extract
- 4 large eggs
- 1 cup (240ml) buttermilk
- 5 oz bittersweet chocolate (60% cacao), chopped
- 2 1/4 cups (504g) unsalted butter
- 8 cups (920g) powdered sugar
- 1 cup (114g) natural unsweetened cocoa powder
- 2 tsp vanilla extract
- 5–7 tbsp (75-105ml) water or cream
- 1/4 tsp salt
- Black gel icing color
- Red gel icing color
- 4 oz red Wilton candy melts
- 2 tbsp heavy whipping cream
- Sprinkles
Instructions
- Preheat your oven to 350°F (175°C) and grease two 9-inch round cake pans.
- In a bowl, whisk together flour, baking powder, baking soda, and salt. In another bowl, beat butter, oil, and sugar until fluffy. Add eggs one at a time, then mix in vanilla and alternating dry ingredients with buttermilk.
- Divide batter into three bowls: one for vanilla, one with melted chocolate, and another colored with black gel icing.
- Layer spoonfuls of the batters into the prepared pans and swirl gently.
- Bake for about 20 minutes until a toothpick comes out clean. Cool before frosting.
- For frosting, mix butter, powdered sugar, cocoa powder, vanilla extract, salt, and water until smooth.
- Frost the cooled cakes and drizzle with melted red candy melts.
Nutrition
- Serving Size: 1 serving
- Calories: 370
- Sugar: 45g
- Sodium: 180mg
- Fat: 16g
- Saturated Fat: 8g
- Unsaturated Fat: 7g
- Trans Fat: 0g
- Carbohydrates: 56g
- Fiber: 1g
- Protein: 4g
- Cholesterol: 65mg