Halloween Cake Pops
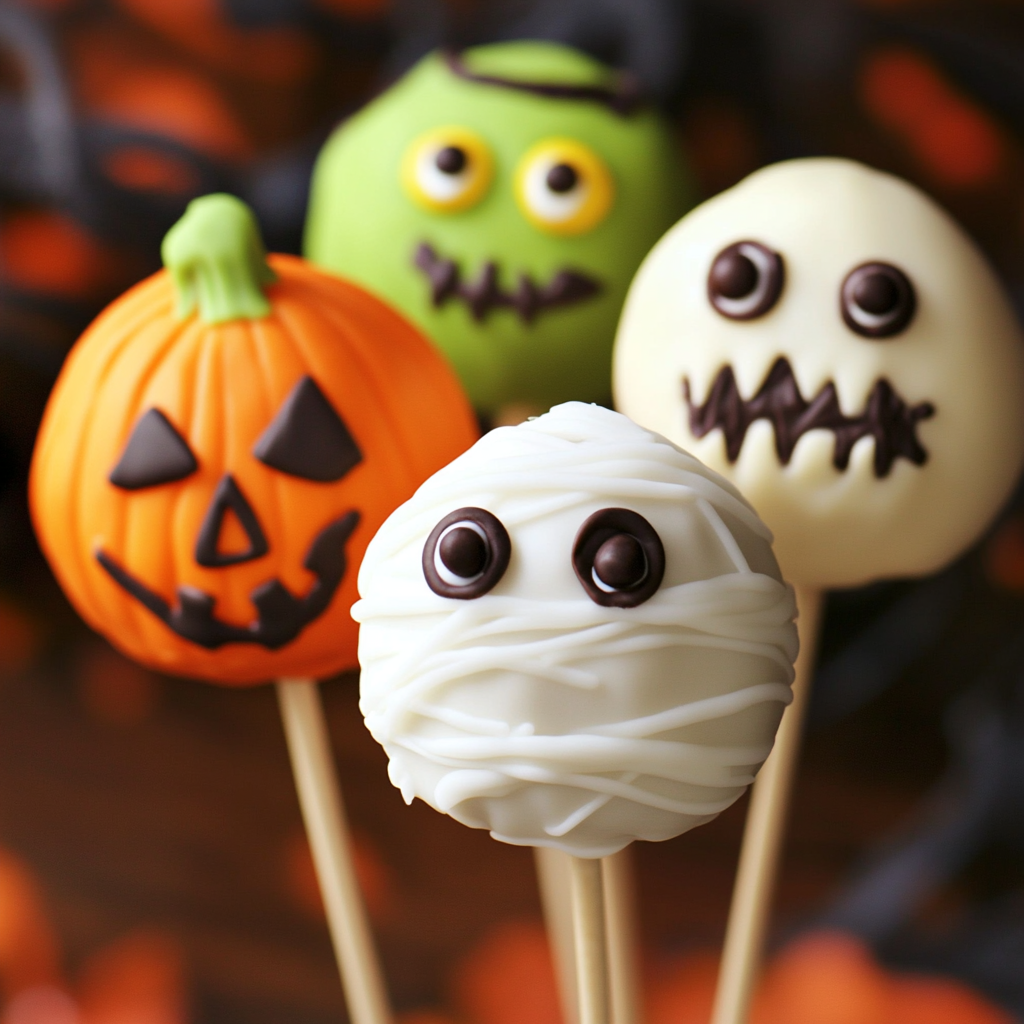
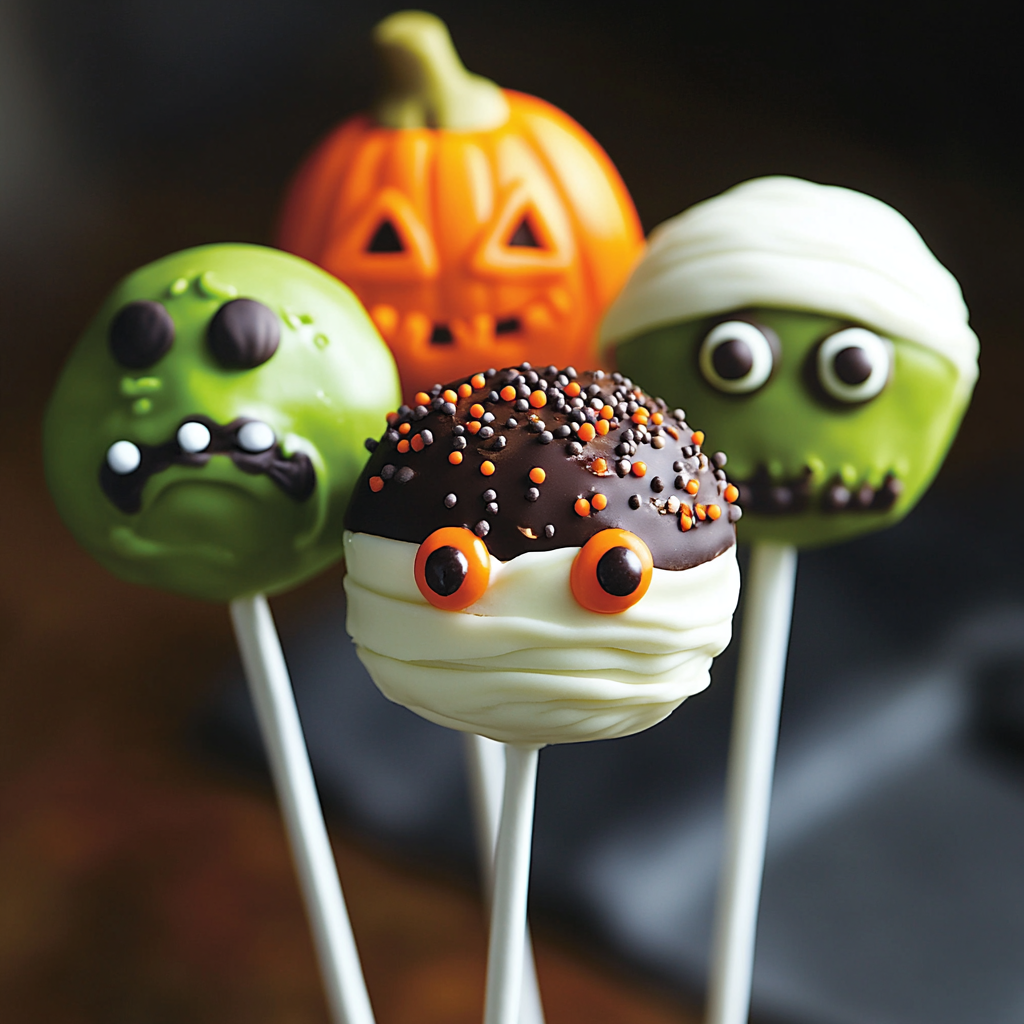
Add these spooky cake pops to your next Halloween party. Made with vanilla or chocolate cake, these bite-sized pieces are perfect for celebrating Halloween. Each cake pop can be decorated as a Pumpkin, Frankenstein, or Mummy, making them not only delicious but also visually appealing for any festive occasion.
Why You’ll Love This Recipe
- Easy to Prepare: With simple ingredients and straightforward steps, you can whip up these Halloween Cake Pops in no time.
- Customizable Decorations: Use your favorite toppings to create unique designs that fit your Halloween theme.
- Perfect for Parties: These cake pops make great treats for Halloween parties, school events, or family gatherings.
- Fun for All Ages: Kids and adults alike will enjoy decorating and eating these tasty treats.
- Delicious Flavor: Choose between rich chocolate or classic vanilla cake for a delightful dessert experience.
Tools and Preparation
Before you dive into making Halloween Cake Pops, gather the necessary tools and ensure you have everything ready.
Essential Tools and Equipment
- Mixing bowl
- Electric mixer
- 13 x 9 inch baking pan
- Refrigerator
- Microwave-safe bowl or stove top
- Cake pop sticks
Importance of Each Tool
- Mixing bowl: A large mixing bowl helps combine all ingredients easily without spilling.
- Electric mixer: Ensures a smooth batter by thoroughly mixing the ingredients quickly.
- Refrigerator: Chilling the cake balls is crucial for firming them up before decoration.
Ingredients
Add these spooky cake pops to your next Halloween party. Made with vanilla or chocolate cake, decorate these bite-sized pieces of cake for Halloween including a Pumpkin, Frankenstein, and a Mummy.
For the Cake Pops
- 1 box Favorite cake mix
- 1 3.4 oz box instant pudding mix
- 4 eggs
- 1 cup water
- 1/3 cup vegetable oil
For the Decoration
- 1 cup Frosting
- Candy Melts
- Toppings – sprinkles, candy eyes
How to Make Halloween Cake Pops
Step 1: Preheat the Oven
Preheat your oven to 350°F. Spray your 13 x 9 inch pan with vegetable pan spray to prevent sticking.
Step 2: Mix the Batter
In a large bowl, combine:
1. Cake mix
2. Instant pudding mix
3. Eggs
4. Water
5. Vegetable oil
Beat at medium speed for about 2 minutes until well mixed. Pour the batter into the greased baking pan.
Step 3: Bake the Cake
Bake in the oven for 30-40 minutes or until a toothpick inserted in the center comes out clean. Let cool in the pan for about 10 minutes before transferring it to a wire rack.
Step 4: Crumble the Cake
Once cooled, crumble the cake into fine pieces using your hands or two forks until no large chunks remain.
Step 5: Add Frosting
Add frosting to the crumbled cake mixture and mix with your fingers until well combined.
Step 6: Form Cake Balls
Shape the mixture into small balls about one inch in diameter.
Step 7: Chill the Cake Balls
Place the formed balls in the refrigerator for at least two hours to let them harden.
Step 8: Melt Candy Melts
Melt Candy Melts in a microwave-safe bowl using 30-second intervals at 50% power until fully melted. Alternatively, you could melt them on a stove top.
Step 9: Insert Sticks
Dip one end of each stick into melted Candy Melts and insert it into each chilled cake ball. Allow them to set; place in the freezer for about 20 minutes if you want to speed up this process.
Step 10: Dip in Candy Melts
After ensuring that the sticks are firmly set, dip each cake pop completely into melted Candy Melts.
Step 11: Add Toppings
Sprinkle on your favorite decorations such as chopped candy, nuts, or sprinkles while the coating is still soft so they stick well.
How to Serve Halloween Cake Pops
Halloween cake pops are not only delicious but also visually striking, making them a perfect treat for your spooky celebrations. Here are some fun serving suggestions to impress your guests.
On a Festive Platter
- Arrange the cake pops on a large platter with Halloween-themed decorations like spider webs or mini pumpkins for an eye-catching display.
As Party Favors
- Wrap each cake pop in clear cellophane and tie with a colorful ribbon. These make great take-home treats for your guests.
In a Candy Buffet
- Include cake pops in a candy buffet along with other Halloween treats. Guests can mix and match their favorites, creating a personalized dessert experience.
With Themed Drinks
- Pair your cake pops with themed drinks like pumpkin spice smoothies or spooky punch to enhance the festive atmosphere.
As Centerpieces
- Place cake pops in a floral foam block covered with black or orange tissue paper. This makes for a creative centerpiece that adds charm to your table setting.
For Trick-or-Treaters
- Keep some cake pops aside to hand out to trick-or-treaters who come knocking at your door. They will love this sweet surprise!
How to Perfect Halloween Cake Pops
Creating the perfect Halloween cake pops takes a bit of practice and attention to detail. Here are some tips to help you achieve the best results.
- Use Quality Ingredients: Start with high-quality cake mixes and frosting for the best flavor and texture.
- Chill Before Dipping: Ensure your cake balls are chilled before dipping them in melted Candy Melts. This helps them hold their shape.
- Thin Consistency: Melt your Candy Melts until they have a smooth and thin consistency. This makes it easier to coat the cake pops evenly.
- Decorate Quickly: Add toppings immediately after dipping while the coating is still wet, so they stick properly.
- Experiment with Flavors: Don’t be afraid to try different flavors of cake mix or frosting for unique variations on traditional Halloween cake pops.
Best Side Dishes for Halloween Cake Pops
Complementing your Halloween cake pops with tasty side dishes can elevate your dessert table. Here are some delightful options:
- Pumpkin Soup: A creamy pumpkin soup served warm adds seasonal flavor and pairs well with sweet treats.
- Savory Spider Breadsticks: These twisted breadsticks shaped like spiders make a fun snack that kids will enjoy.
- Witch’s Fingers Veggie Platter: Arrange fresh vegetables like celery sticks and bell pepper strips as spooky witch fingers, served with hummus.
- Mummy Hot Dogs: Wrap hot dogs in crescent dough and bake until golden for an easy, festive finger food.
- Ghostly Guacamole: Serve guacamole in a skull-shaped bowl, paired with tortilla chips for dipping.
- Cauldron Chili: A hearty chili served in small cauldron-like bowls provides warmth and comfort during cooler fall nights.
- Black Bean Salsa: This refreshing salsa made from black beans, corn, and tomatoes offers a burst of flavor alongside sweet treats.
- Spooky Popcorn Mix: Create a popcorn mix with candy corn, chocolate candies, and nuts for a crunchy snack that complements the soft texture of cake pops.
Common Mistakes to Avoid
When making Halloween Cake Pops, it’s easy to make some common errors. Here are a few pitfalls to watch out for:
- Using too much frosting – Overloading on frosting can make your cake pops too mushy. Start with a small amount and gradually add more until the mixture holds together well.
- Not chilling before dipping – If you skip chilling the cake balls, they can fall apart when dipped in melted Candy Melts. Chill for at least 2 hours for better results.
- Improper melting of Candy Melts – Melting at too high a temperature can cause the Candy Melts to seize up. Always melt in short intervals and at 50% power to keep them smooth.
- Skipping decorations – The fun of Halloween Cake Pops is in the decorating! Don’t forget to add sprinkles or candy eyes for that spooky touch.
- Using stale ingredients – Fresh ingredients are key for delicious cake pops. Check the expiration dates on your cake mix and pudding mix before starting.
Storage & Reheating Instructions
Refrigerator Storage
- Store Halloween Cake Pops in an airtight container.
- They will last for about 5-7 days in the fridge.
Freezing Halloween Cake Pops
- Wrap each cake pop individually in plastic wrap.
- Place them in a freezer-safe container; they can be frozen for up to 3 months.
Reheating Halloween Cake Pops
- Oven – Preheat your oven to 350°F and warm for about 5-10 minutes, keeping an eye on them.
- Microwave – Heat in short bursts of 10-15 seconds until just warmed through; do not overheat.
- Stovetop – Use a skillet on low heat, covering it with a lid; this method keeps them moist.
Frequently Asked Questions
Here are some common questions about making Halloween Cake Pops:
Can I use different flavors of cake?
Absolutely! Feel free to experiment with any flavor of cake mix you love, whether it’s vanilla, chocolate, or even red velvet.
How do I make my cake pops stand out?
You can customize your Halloween Cake Pops by using different colored Candy Melts or adding unique toppings like edible glitter or themed sprinkles.
What if my cake pops are too soft?
If your mixture is too soft, try adding more crumbled cake or chilling it longer before shaping into balls.
Can I use homemade cake instead of box mix?
Yes! Homemade cake works wonderfully as well. Just ensure it’s fully cooled before crumbling it.
How do I know when my Candy Melts are ready?
The Candy Melts should be completely smooth and pourable; if they’re lumpy, keep melting them in intervals until they reach the right consistency.
Final Thoughts
Halloween Cake Pops are a delightful treat that brings fun and creativity to any celebration. Their versatility allows you to play with flavors and decorations, making them perfect for personalizing your spooky treats. Give this recipe a try, and let your imagination run wild with designs!
Halloween Cake Pops
Add some festive flair to your Halloween celebrations with these delightful Halloween Cake Pops! These bite-sized treats are made from rich chocolate or classic vanilla cake, perfectly crumbled and mixed with frosting before being coated in colorful candy melts. Each pop can be decorated to resemble spooky characters, like pumpkins, mummies, or Frankenstein, making them not only delicious but also a visual feast for the eyes. Easy to prepare and fun for all ages, these cake pops are ideal for parties, school events, or family gatherings. Get ready to impress your guests with this creative dessert that’s sure to be a hit!
- Prep Time: 25 minutes
- Cook Time: 35 minutes
- Total Time: 1 hour
- Yield: Approximately 12 servings 1x
- Category: Dessert
- Method: Baking
- Cuisine: American
Ingredients
- 1 box favorite cake mix
- 1 3.4 oz box instant pudding mix
- 4 eggs
- 1 cup water
- 1/3 cup vegetable oil
- 1 cup frosting
- Candy melts (for coating)
- Toppings (sprinkles, candy eyes)
Instructions
- Preheat the oven to 350°F and grease a 13 x 9 inch baking pan.
- In a large mixing bowl, combine the cake mix, pudding mix, eggs, water, and vegetable oil; beat for 2 minutes.
- Pour the batter into the prepared pan and bake for 30-40 minutes until a toothpick comes out clean.
- Let the cake cool before crumbling it into fine pieces.
- Mix in frosting until well combined and shape into small balls.
- Chill the balls in the refrigerator for at least two hours.
- Melt candy melts using a microwave or stovetop until smooth.
- Insert sticks into chilled cake balls dipped in melted candy melts; allow to set.
- Dip each pop into candy melts and add your choice of toppings.
Nutrition
- Serving Size: 1 cake pop (45g)
- Calories: 150
- Sugar: 15g
- Sodium: 120mg
- Fat: 6g
- Saturated Fat: 2g
- Unsaturated Fat: 3g
- Trans Fat: 0g
- Carbohydrates: 22g
- Fiber: <1g
- Protein: 2g
- Cholesterol: 20mg

